What Happens During an Autobody Panel Repair?
Learn what happens during an autobody panel repair, from damage inspection and dent reshaping to paint matching, finishing, reassembly, and final checks.
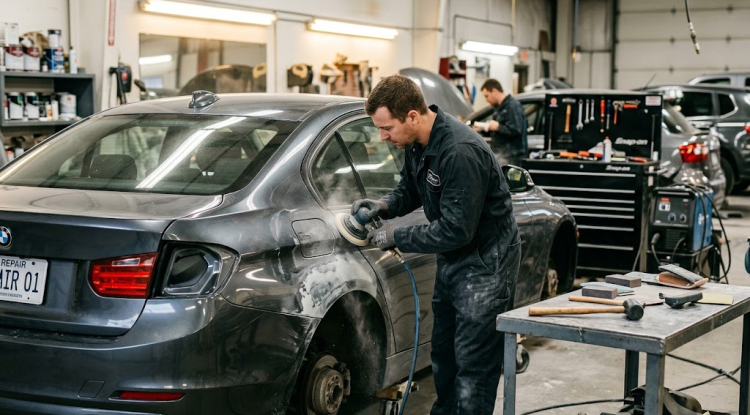
A damaged body panel can make even a minor accident look serious. A dented door, scraped fender, bent quarter panel, or damaged hood affects more than your vehicle’s appearance. Depending on the severity of the damage, it can also interfere with panel alignment, paint protection, doors and other components. Understanding what happens during an autobody panel repair can make the process much less confusing and help you know what to expect when your vehicle goes into a repair facility.


When you take your vehicle to an Auto body shop Calgary, the repair process usually begins with a careful inspection rather than immediately removing or replacing the damaged panel. Technicians assess the visible damage, check surrounding areas, and determine whether the original panel can be restored. From there, the repair may involve dent removal, reshaping, surface preparation, painting, and final quality checks. The exact steps depend on the type and extent of damage.
What Is an Autobody Panel?
An autobody panel is one of the exterior sections that forms the visible body of a vehicle. Common examples include:
- Doors
- Fenders
- Hoods
- Trunk lids
- Quarter panels
- Roof panels
- Side panels
These components are designed to fit together with specific gaps and contours. Even a relatively small impact can change the shape of a panel or affect how it sits against neighboring parts.
Not every damaged panel needs to be replaced. If the underlying material is structurally sound and the damage is repairable, a technician may be able to restore the original panel.
Step 1: Inspecting the Damage
The first stage is a detailed inspection. The technician examines the damaged panel from different angles and looks for dents, creases, scratches, paint damage, cracks, and signs of distortion.
The inspection also extends beyond the obvious damage. An impact that creates a dent in a door, for example, may affect hinges, internal supports, trim, or adjacent panels.
Technicians consider several factors when deciding how to proceed:
- Location of the damage
- Size and depth of the dent
- Sharpness of creases
- Condition of the paint
- Material and construction of the panel
- Damage to surrounding components
- Accessibility behind the damaged area
This assessment helps determine whether repair, partial repair, or panel replacement is appropriate.
Step 2: Removing or Accessing Necessary Parts
Before repairing the panel itself, technicians may need to remove certain components. Depending on the location, this can include trim pieces, lights, moldings, handles, mirrors, bumpers, or interior door components.
Removing these parts provides better access and helps prevent accidental damage during the repair.
For example, repairing a door may require access behind the outer skin. A technician may carefully remove interior components so the damaged section can be reached safely and accurately.
Not every repair requires extensive disassembly. The technician chooses the approach based on the damage and the panel's construction.
Step 3: Straightening and Reshaping the Panel
Once the damaged area is accessible, the technician begins restoring the panel's original shape.
For a conventional dent, specialized tools can be used to work the metal back into position. Depending on the damage, technicians may apply controlled pressure from behind the panel or use tools that allow them to carefully manipulate the exterior surface.
The goal is not simply to make the dent disappear. The panel needs to return as closely as possible to its original contours.
Sharp creases and deep dents can require more detailed work because the metal may have stretched or folded during the impact. In these situations, rushing the repair can leave visible imperfections beneath the paint.
H3: Why Precision Matters
Body panels are designed with specific curves and body lines. A repair that looks acceptable from one angle may still be noticeable when viewed under different lighting.
That's why technicians pay close attention to:
- Factory body lines
- Panel contours
- Door and hood gaps
- Alignment with adjacent panels
- Overall surface smoothness
A precise repair creates a better foundation for the finishing stages.
Step 4: Preparing the Surface
After the panel has been reshaped, the surface needs to be prepared for finishing.
The technician may sand the repaired area to remove imperfections and create a suitable surface for subsequent materials. If small low spots or surface irregularities remain, an appropriate body filler may be used and carefully shaped.
The filler is not intended to replace proper metal repair. It is generally used to address minor surface imperfections after the major deformation has been corrected.
The repaired area may then go through additional sanding and inspection. This stage can be repeated until the surface is sufficiently smooth and consistent.
Step 5: Priming the Repaired Area
Once surface preparation is complete, primer may be applied.
Primer serves as an important layer between the prepared surface and the paint system. It can help provide a suitable base for paint while supporting adhesion and helping protect the underlying surface.
The repaired area must be properly prepared before primer is applied. Dust, grease, moisture, and other contaminants can interfere with the finishing process.
After the primer has cured appropriately, the technician may sand and inspect it again to ensure the surface is ready for paint.
Step 6: Matching the Paint
Paint matching is one of the most important parts of a visible body panel repair.
Modern vehicles can have complex finishes that change slightly depending on lighting, age, exposure, and paint characteristics. Simply choosing a color name or basic paint code does not always guarantee a visually seamless result.
Technicians may use the vehicle's paint information along with color-matching equipment and visual assessment to determine the appropriate paint formula.
The surrounding finish also matters. A panel that has been freshly painted should blend naturally with the existing vehicle rather than appearing noticeably different.
Step 7: Applying the Paint and Clear Coat
Once the color has been selected and the surrounding area properly protected, the finishing process begins.
The paint is typically applied in controlled layers. Depending on the vehicle and paint system, this can involve a basecoat followed by a clear coat.
The clear coat provides the glossy exterior finish and contributes to protection against environmental exposure.
Proper application requires attention to factors such as:
- Spray technique
- Paint coverage
- Drying or curing conditions
- Surface cleanliness
- Layer consistency
The technician must also manage the transition between the repaired section and the existing finish.
Step 8: Curing and Finishing
After painting, the repaired area needs sufficient time to dry or cure according to the products and process being used.
Once the finish has cured, technicians may inspect the panel for imperfections such as dust particles, uneven texture, runs, or other finishing issues.
Additional polishing or finishing work may be performed when appropriate. The goal is to achieve a smooth appearance that integrates with the surrounding bodywork.
Step 9: Reassembling the Vehicle
After the panel repair and paintwork are complete, removed components are reinstalled.
This can include trim, lights, handles, mirrors, moldings, bumpers, or interior components.
Reassembly is more than simply putting parts back where they were. Technicians need to make sure components are secure and that panel gaps and alignments are correct.
For doors, hoods, and trunks, proper alignment is particularly important because these panels need to open, close, and latch correctly.
Step 10: Final Inspection
A final inspection is performed before the vehicle is considered ready.
The technician may examine the repaired panel under suitable lighting and from multiple angles. They can also check alignment, gaps, paint consistency, surface quality, and the operation of any components that were removed during the repair.
This final step helps identify issues that might not have been obvious during earlier stages.
Repair or Replace: How Is the Decision Made?
One of the most common questions vehicle owners have is whether a damaged panel should be repaired or replaced.
There isn't a single answer for every vehicle. A technician generally considers the extent and location of the damage, the condition of the panel, how much the material has been distorted, and whether the panel can be restored effectively.
Repairing the original panel may be appropriate when the damage is limited and the panel remains suitable for restoration. Replacement may make more sense when the panel is severely damaged, structurally compromised, or cannot be returned to an acceptable condition through repair.
The decision should be based on the specific vehicle and damage rather than simply the size of the dent.
How Long Does an Autobody Panel Repair Take?
Repair time varies considerably.
A small dent with limited paint damage may require much less time than a heavily creased panel that needs reshaping and refinishing. Additional factors can include parts availability, the number of panels involved, paint matching, curing requirements, and whether hidden damage is discovered during disassembly.
A repair estimate can provide a more useful timeframe after the vehicle has been inspected.
What Should You Ask Before the Repair?
Before authorizing panel work, it is reasonable to ask the repair facility a few practical questions:
Can the Existing Panel Be Repaired?
Ask whether the technician recommends repairing the original panel or replacing it and why.
Is There Hidden Damage?
Find out whether the inspection identified damage behind or around the visible panel.
Will the Paint Need to Be Blended?
For certain repairs, blending into an adjacent panel may help achieve a consistent visual finish.
What Components Will Be Removed?
Knowing what will be disassembled can give you a clearer picture of the repair process.
How Will the Finished Repair Be Inspected?
A professional repair should include checks for panel alignment, finish quality, and proper operation of affected components.
How to Protect a Newly Repaired Panel
After receiving your vehicle, follow the repair facility's recommendations regarding washing, waxing, polishing, and exposure to environmental conditions. Freshly repaired finishes may require specific care while the paint system completes its curing process.
Once the finish is ready for normal care, regular washing can help remove road grime, salt, and contaminants that can affect the exterior over time. Promptly addressing new scratches or chips can also help prevent additional deterioration.
Final Thoughts
An autobody panel repair is a detailed process that goes far beyond simply pushing out a dent and applying paint. From the initial inspection and panel reshaping to surface preparation, paint matching, finishing, reassembly, and final inspection, each stage contributes to the quality and appearance of the completed repair. Understanding these steps can help vehicle owners ask better questions and make informed decisions about their vehicles. When professional Calgary Autobody Repairs are needed, knowing what the process involves also makes it easier to understand why careful workmanship and thorough inspection matter.
What's Your Reaction?