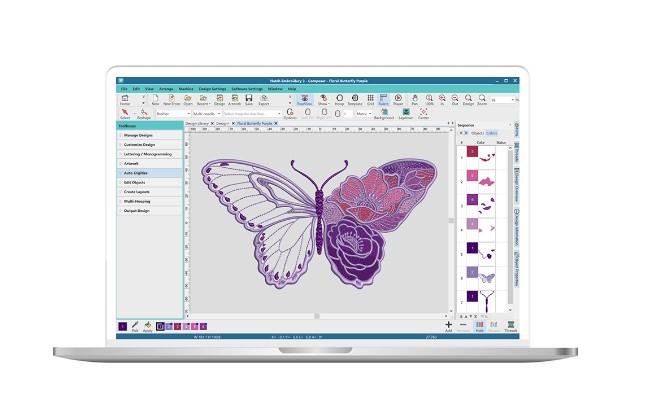
Embroidery digitizing is no longer limited to heavy desktop setups. Today, with powerful apps and cloud-based tools, you can digitize embroidery designs right on your iPad — whether you’re at home, in your studio, or relaxing at a café. But here’s the catch: while convenience is great, you don’t want to sacrifice stitch quality just for mobility. That’s why many pros still turn to reliable digitizing services like Digitizing Buddy for complex designs, ensuring flawless, machine-ready results every time.
In this guide, we’ll walk you through how to digitize embroidery on iPad effectively, the best apps to use, tips to maintain quality, and when to outsource for perfection.
Can You Really Digitize Embroidery on an iPad?
Yes — but with limitations.
Modern iPads, especially the iPad Pro with the M1 or M2 chip, have enough processing power to handle graphic editing and even basic digitizing tasks. Combined with the Apple Pencil, you can trace, edit, and refine designs with precision.
However:
- Full-featured embroidery digitizing software (like Wilcom or Hatch) is not available as native iPad apps.
- You’ll often need cloud-based or simplified apps that offer digitizing features.
- Complex stitch mapping is still easier with professional desktop software.
The Benefits of Digitizing on an iPad
- Portability – Work from anywhere.
- Touch & Pen Control – Apple Pencil makes tracing and editing intuitive.
- Quick Edits – Make last-minute changes before sending to a client or machine.
- Cloud Syncing – Store and access your work across devices.
Best iPad Apps for Embroidery Digitizing
While no iPad app completely replaces advanced PC digitizing software, some options come close for light to moderate work:
1. Procreate
- Not embroidery-specific, but great for creating clean vector-like artwork.
- Use it to prepare and refine your design before sending it to a digitizing service.
- Tip: Work in high resolution to retain detail.
2. Affinity Designer for iPad
- A vector design app with precision tools.
- Export designs in SVG or PDF format for conversion.
- Best for logo and lettering preparation.
3. Inkstitch (via cloud or remote desktop)
- An open-source embroidery extension for Inkscape.
- You can run it remotely from your iPad using a cloud desktop service.
4. Cloud-based Software
-
Tools like Wilcom Workspace allow you to do basic stitch editing and previews directly in your browser.
How to Digitize Embroidery on iPad Without Losing Quality
1. Start with a High-Quality Image
- Use vector artwork whenever possible.
- Avoid low-resolution JPEGs — they lead to rough, jagged stitch paths.
2. Use Layers for Clarity
- Separate elements (letters, shapes, patterns) into layers.
- Makes the stitch sequencing easier later.
3. Export in a Digitizing-Friendly Format
- Common formats: SVG, EPS, or high-res PNG.
- Avoid formats that compress detail.
4. Test Your Design
- If you have an embroidery machine, run a test stitch-out.
- Look for thread breaks, misalignments, or puckering.
The Limitations of iPad Digitizing
While iPads are great for portability, they lack:
- Full stitch-type control found in advanced digitizing software.
- Automatic stitch optimization for different fabrics.
- Built-in machine format exports like PES, DST, or JEF without extra steps.
This is where outsourcing comes in.
When to Outsource Digitizing to Professionals
If your design is:
- Highly detailed
- Intended for commercial use
- Going on tricky fabrics (caps, jackets, stretchy materials)
…it’s worth letting experts handle the stitch mapping.
Digitizing Buddy specializes in turning your artwork into flawless, machine-ready embroidery files — with proper density, underlay, and sequencing for your specific machine and fabric.
Pro Tips for Maintaining Quality
- Avoid Tiny Text – Small letters often stitch poorly.
- Mind the Stitch Density – Too dense causes thread breaks; too loose makes the design look incomplete.
- Choose the Right Underlay – Helps keep stitches stable on different fabrics.
- Keep It Simple for iPad Work – Use your iPad for artwork prep, then let professionals finalize the stitch file.
Workflow Example: iPad + Pro Digitizer Combo
- Create/Refine Artwork on iPad – Use Procreate or Affinity Designer.
- Export High-Resolution File – Save as SVG, EPS, or PNG.
- Send to Digitizing Buddy – They convert it into your machine format (PES, DST, etc.).
- Receive & Stitch – Test the file on your embroidery machine.
This hybrid method gives you:
- The creative freedom of iPad work.
- The technical perfection of professional digitizing.
Why Digitizing Buddy is Perfect for iPad Users
- Fast Turnaround – Upload your artwork from iPad and get your file in hours.
- Any Format – PES, DST, JEF, EXP, and more.
- Fabric Optimization – Designs are tailored to your fabric type.
- Affordable Rates – Quality without overpaying.
Final Thoughts
Digitizing embroidery on an iPad is possible and convenient, especially for quick edits and design prep. But if you want perfect stitching with no quality compromises, pairing your iPad creativity with a service like Digitizing Buddy is the ultimate solution. You get the flexibility of working anywhere and the professional results your embroidery deserves.


